Hi everyone!! I just wanted to let you all know that I will be migrating my website to a new host with a refreshing new look! During this period there will be a downtime. I apologize for the inconvenience and will have it back up as soon as possible. The website address will remain the same so come back and check it out when it is done!
Saturday, August 13, 2016
Tuesday, January 19, 2016
Florentines
So I made some Florentine biscuits because they look so fun and unique. Not your everyday bake.
The Florentine recipe normally is a mix of finely chopped nuts with cherries and other fruits but I'm not a fan of fruits in cookies so I decided to leave them out and decided to make my Florentines just a caramelized nut biscuit coated in chocolate. You can't go wrong with that and it didn't disappoint. Au Contraire! I had to fight the husband away with a chair so I could get a picture before he devoured them.
I actually put the chocolate on in a few different ways to decide which was the tastiest. The half chocolate covered Florentine won the taste test due to the balance of chocolate and biscuit so that's the way I will do them in the future.
These were actually not difficult to make either (bonus!). It was fast and fun so I would highly recommend this for any event or gift.
I've been watching the Great British Baking Show and the base of this recipe is from that show.
Half Chocolate Florentine
(The color difference between the pictures is less than a 1 minute baking time difference so watch your Florentines carefully!)
Chocolate-backed Florentine.
The back picture is done by spreading the chocolate on parchment paper and then placing the caramelized biscuit in the chocolate until it dries. The front picture is just taking a spatula and spreading the chocolate onto the back and allowing it to dry chocolate side up.
They were ALL tasty so you really can't go wrong but we liked the half chocolate Florentine best.
Here's the recipe! Enjoy!
Florentines
Ingredients:
1.75 oz Unsalted Butter
1.75 oz Unsalted Butter
1.75 oz Brown Sugar
0.88 (7/8) oz Honey
0.88 (7/8) oz Corn Syrup
1.75 oz All-Purpose Flour
1 oz Almonds, Finely Chopped
1 oz Walnuts, Finely Chopped
8 oz Plain Chocolate (I used 56% Semisweet Baking Chocolate)
Preheat oven to 350 degrees F. Line 3 (or 4) baking trays with parchment paper. Heat the butter, sugar, honey and corn syrup over low heat until butter is melted. Remove from heat and add the flour and nuts and stir until well mixed. Make 18 (or 24) Florentines by spooning a heaping teaspoon (or a flat teaspoon for a little smaller Florentine) onto the trays with 6 to a tray. Give them plenty of room to spread. They will spread surprisingly! Bake for 8-10 minutes or until golden brown. Watch them at the end. They can overcook quickly. Leave the Florentines to cool on the tray for a few minutes and then move to a cooling rack to harden being careful not to break the biscuit. They are quite delicate...well at least mine were. :) If the Florentines become to hard to remove then pop them back in the oven for a minute or two to soften and try again.
Use a double boiler or a heat proof bowl over a pan with simmering water to melt half the chocolate until it reached 127 degrees F stirring constantly. Remove from heat and add the remaining chocolate stirring gently until the chocolate has melted. Using a spatula, spread the chocolate onto half of the front of the Florentine. Simply wipe the back of the Florentine to remove the excess chocolate and swirl the chocolate on the front of the Florentine. Place the Florentine on the pan to harden (back side down). Voila! Store in an airtight container if they don't get devoured immediately.
Monday, January 18, 2016
I'm Baaaaaaaaaaaaaack!
Well, it sure has been a long time and it feels good to be back! Life just got so busy that I had to make some changes. I got married... that's one huge wonderful change. :) I quit my band.... that's another big change. I also accomplished some major milestones at work (phew!) and am feeling more settled in.
So now it is time to get back to doing what I love. Making yummy stuff for people I love and sharing it with YOU!
There are a few delectables that I have created in the last year that I haven't blogged about so I will recap those things for you. One of my ultimate favorites is a wedding cake for my friend Susan. Now I'm no professional when it comes to making desserts let alone wedding cakes but this one just turned out beautiful and I love it. I can do simple.
The bottom cake was chocolate with chocolate frosting, the middle was strawberry with strawberry frosting and the top was my yellow cake with vanilla buttercream frosting. When you can't decide, you don't have to. :)
The pink vintage flowers are from Tai Pan and the ribbon and lace were from JoAnn's. (Make sure you look at the price of the lace you are buying, lace can be REALLY expensive!)
The biggest trick was matching the yellow to the wedding colors which was inspired from family heirloom dishes that were being used for the desserts. It was NOT easy. But huzzah! It was accomplished.
If you are going to use non-edible decorations on your cake, make sure the recipient knows that they are not edible and make sure the products are non-toxic and you wash them before putting them into the cake (ie: flowers stems).
So there she be.
Stay tuned for more 2015 recaps.
Sunday, February 15, 2015
Valentine's Day Cake Pops
I whipped up some cake pops for my awesome neighbors today for Valentine's Day. I just thought I would share a picture. They turned out pretty cute.
I hope you are all surrounded by people you love and who love you!
Happy Sabbath.
"For God so loved the world, that he gave his only begotten son, that whosoever believeth in him should not perish, but have everlasting life."
John 3:16
Saturday, February 7, 2015
Toy Story Birthday Party
I am just throwing some phone pictures up of a toy story birthday party my friend just threw for her 1 year old son Emerson. I've helped her with her other two kids' 1st birthdays and it's always a fun theme. This time I had no time to help out (bummer!) so she did all the treats herself this time! I'm so proud! I just helped throw the cake decorations and fondant on quickly before the party (sorry... Not my best work). She made all the fondant and cakes.... I like this gig!
Sunday, July 20, 2014
Baking Cookies {Oatmeal Chocolate Chip}
Who likes oatmeal chocolate chip cookies?!
I do believe that this variety can be one of the tastiest.
These were pretty tasty.
Tip of the Day: The worst offense one can make towards the cookie is overbaking.
Resist! It should not look done when you take it out of the oven. The edges should generally just barely start to golden up.
Barely!
The recipe I used was this one.
I would decrease the white sugar and cook a single tray for 8 minutes. I prefer them to be a bit softer after they completely cool so I will be trying a different recipe but this one was good and wouldn't disappoint.
I use a mini cookie scoop roughly a tablespoon size. Cookies are also best, in my opinion, if they are NOT cooked on parchment or non-stick so they don't spread and become flat. Cook them on an ungreased cookie sheet for a thick, deliciously textured cookie.
Happy Cookieing!
Tuesday, May 7, 2013
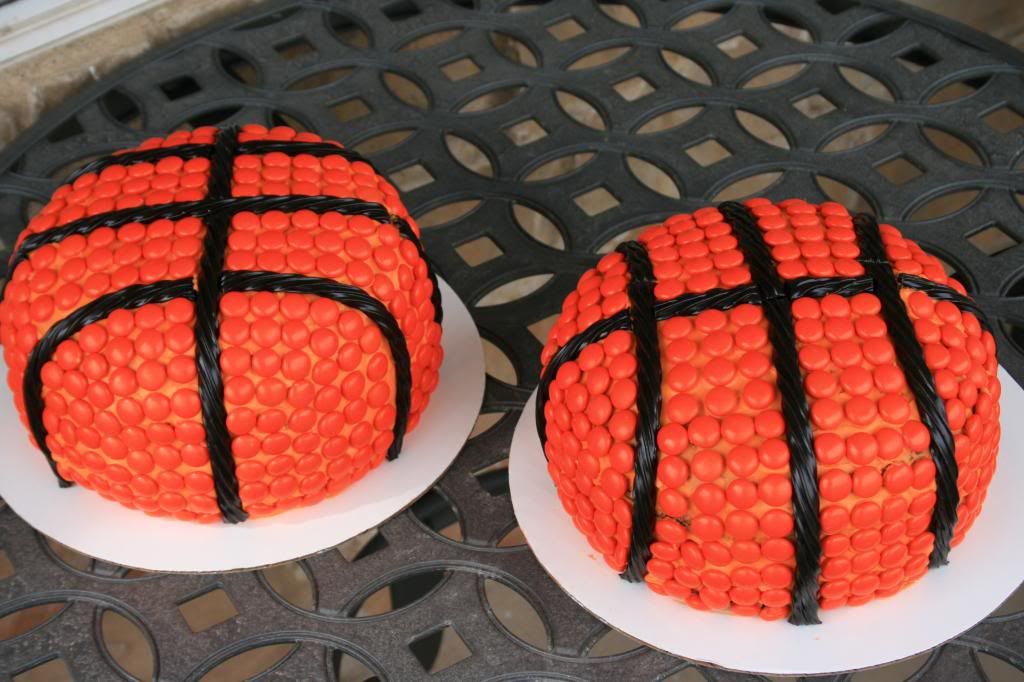
Basketball Cake Tutorial
Wow... 2 months. Has it really been that long since my last post?! Ay Caramba! Lots going on lately.
Check out my other blog for details --->
I actually have a ton of stuff to catch up on so I am going to just do really short posts.
Let me know if you have any questions and I'll answer those and add them back into the posts.
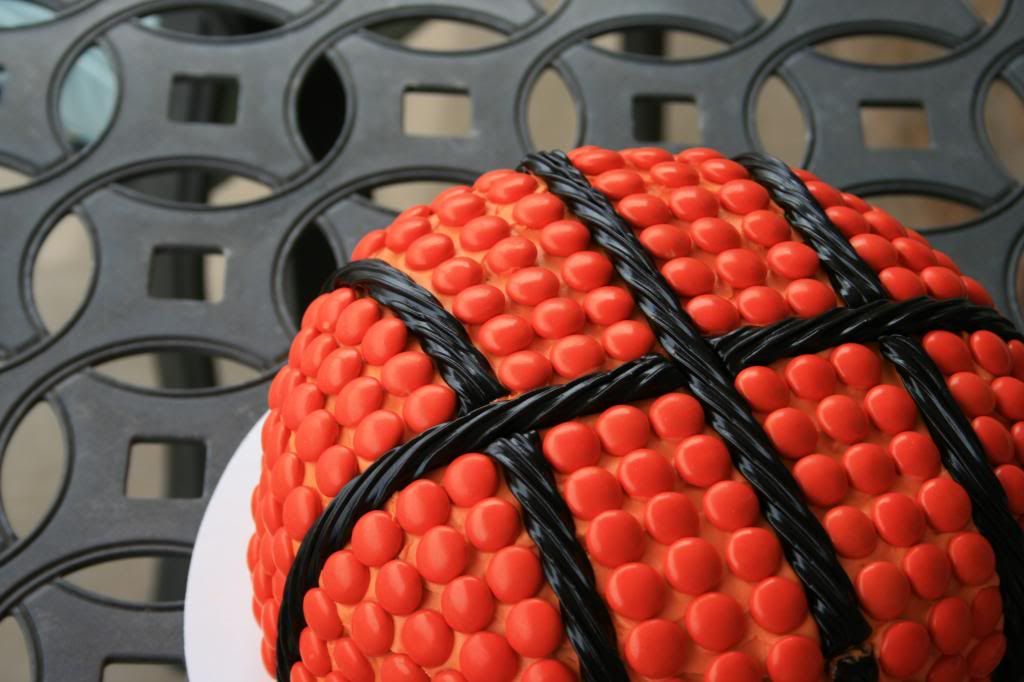
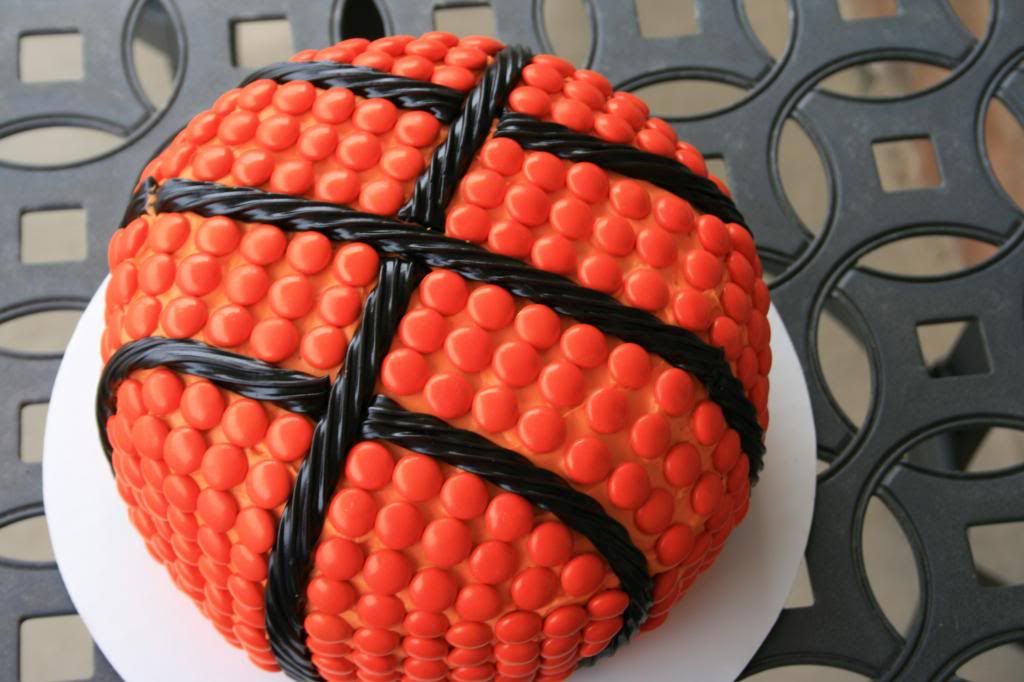
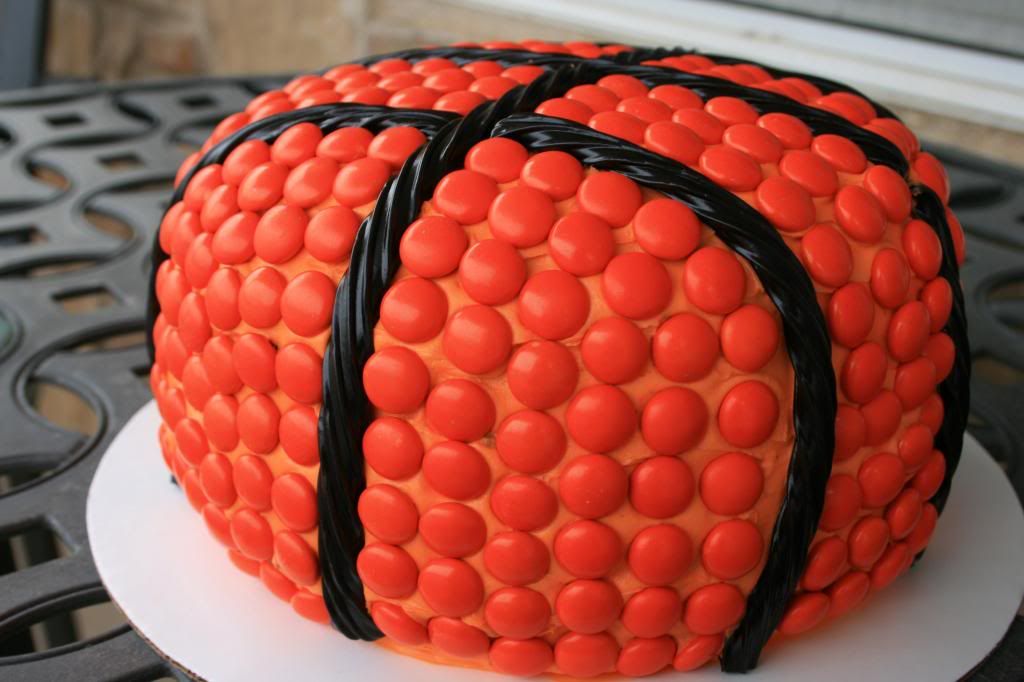
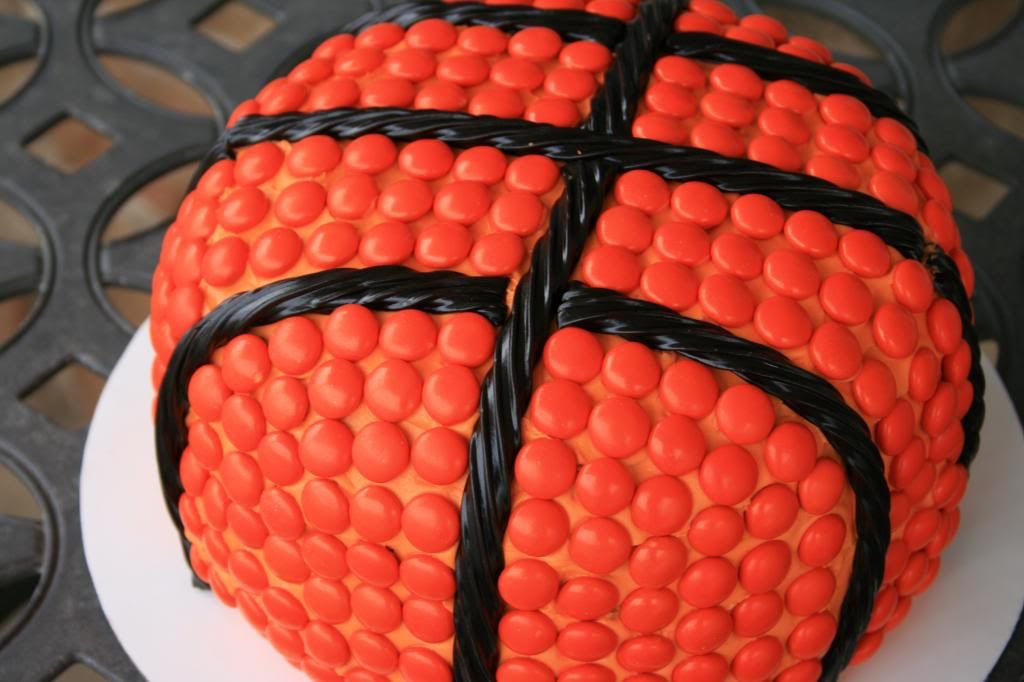
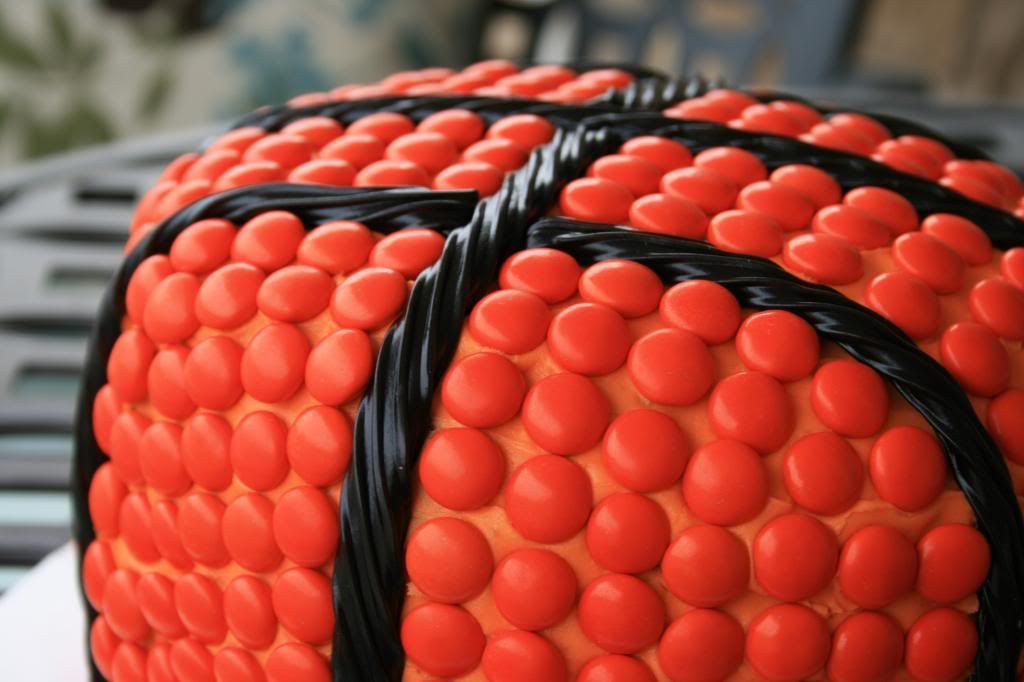
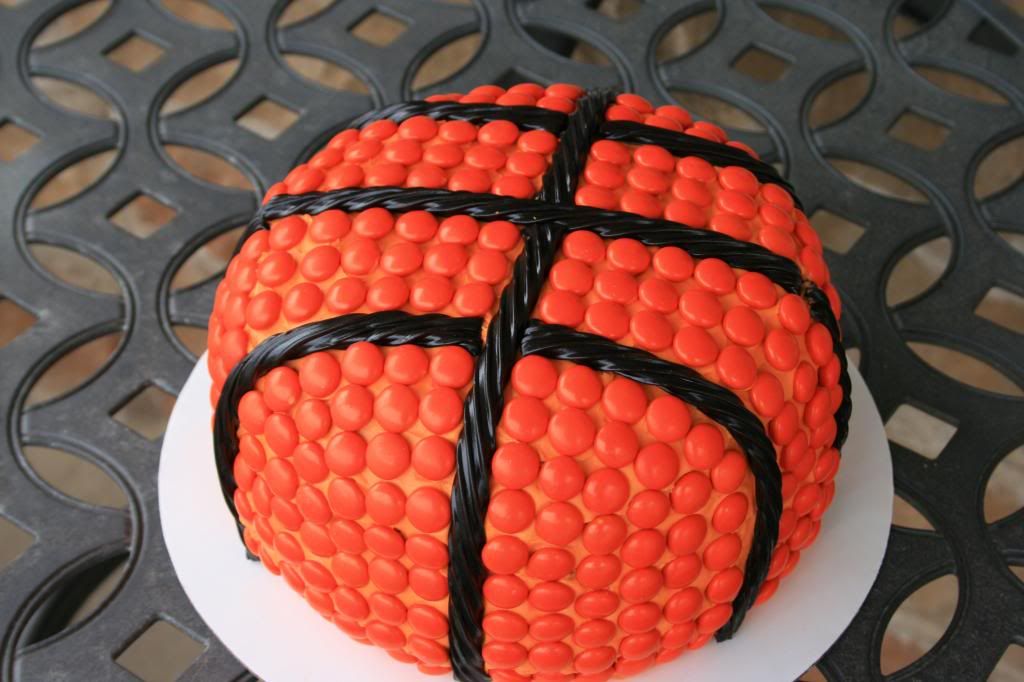
These cakes turned out so cute! They were for my little brother's basketball championship game for his team. It was super simple.
I made 8 inch round cakes and stacked them 2 high with frosting in between. I cut the cakes so they rounded off as much as I could on both the top and bottom (to try to make them look as round as possible without falling apart). This would also be really cute if you used a dome cake pan to truly make it round. I colored some buttercream orange (using water-based food gel) and covered the whole cake. Looking back I wish I had done the orange a little bit darker but I think I actually ran out of orange color and that's why. :)
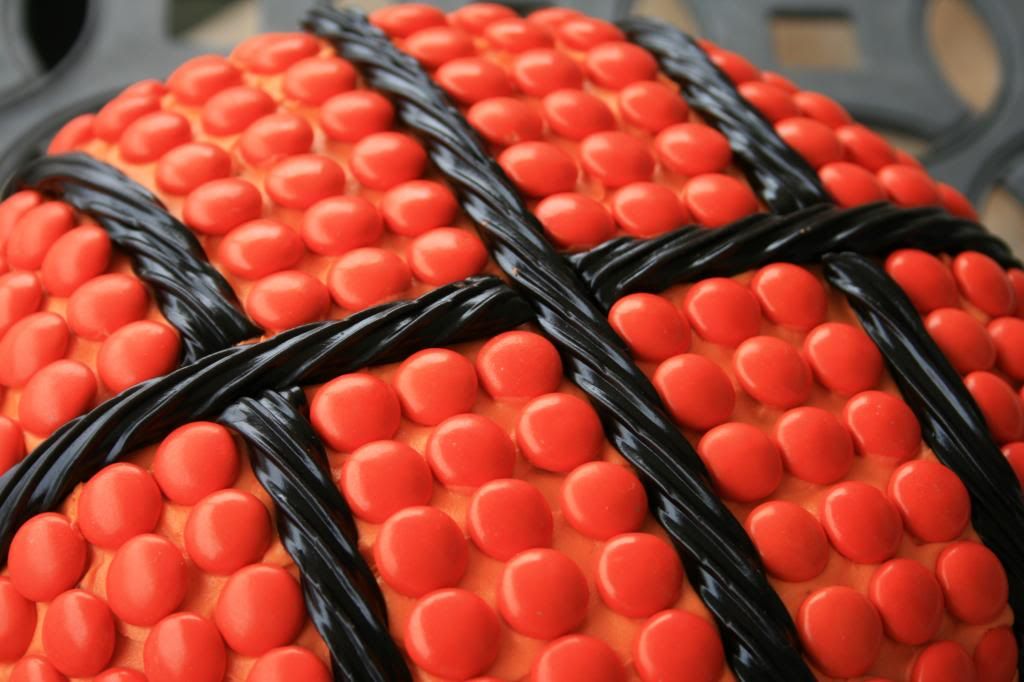
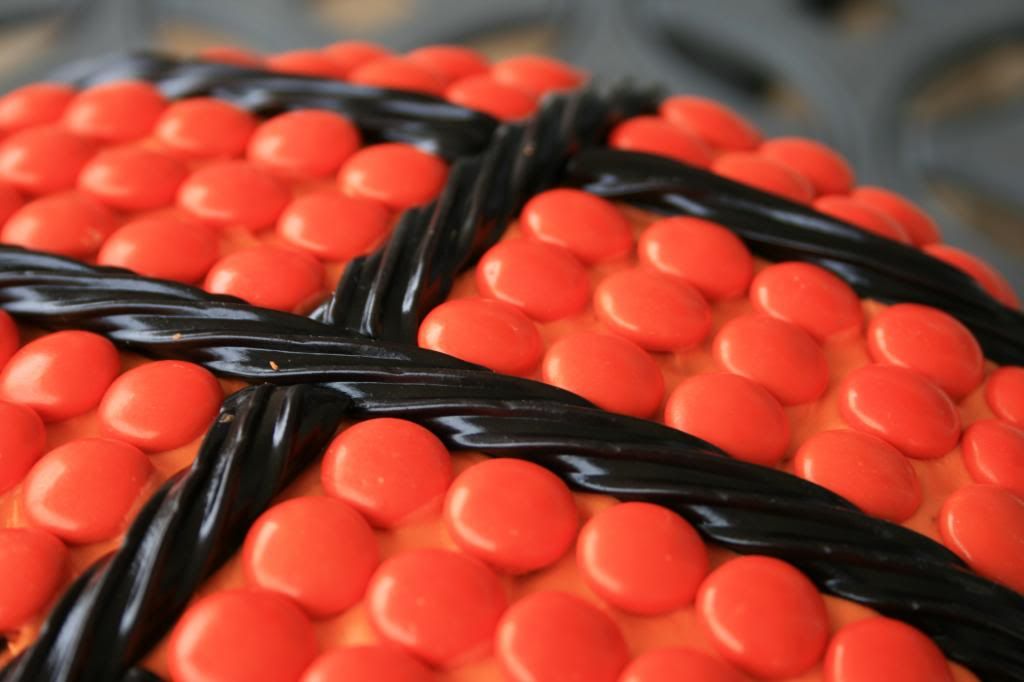
Once you do that, take plain twizzler black licorice for the stripes and lay one across the middle of the cake. You will have to use more than 1 rope for each line. Try to connect them away from the bends because they tried to stick up on me and wouldn't stay bent how I wanted them to.
Lay a rope perpendicular to the one you just laid (see pictures) and you can just start them right on each side of the first one (make sense?).
Then take about 3 orange m&ms- you can get plain orange m&ms at certain party stores. I went to Zurchers- and lay them down (with the m&m brand facing down) starting at the corner of the licorice on each side (again see picture). Do about 2 rows. You want them to be as close as possible. It looks better. Laying the 3 m&ms down helps you measure where your outer licorice lines should go. Now lay down your last outside licorice lines. To get a bit of a rounder effect, curve the licorice at the bottom back towards your main middle line just a little bit (see picture- right licorice is curved in a little).
Voila! And there you have it. These are not difficult to make but do take a little bit of time and dexterity since you have to place each m&m.
I want to say I used about 12-16 oz of m&ms by weight to cover these 2 cakes and 1 package of black licorice (I think! I forgot to write it down so if it just doesn't seem right when you are buying the m&ms, go with your gut. Extra m&ms never hurt anyone. That was my philosophy). I bought way too many m&ms so now extras are sitting in a dish on my desk waiting for on-lookers to come and eat them. They are sitting right next to the new Sherbert Oreos I had to get for my work people because they looked weird... yeah, they're pretty sweet (as in sugary... not awesome). Not my favorite. Other people liked them though..... tangent.
If you really want to know how many I used... you could count the m&ms on the cake. =D
Anyway, they were a big hit! So fun. Try them out for your next sports party!
Subscribe to:
Posts (Atom)


